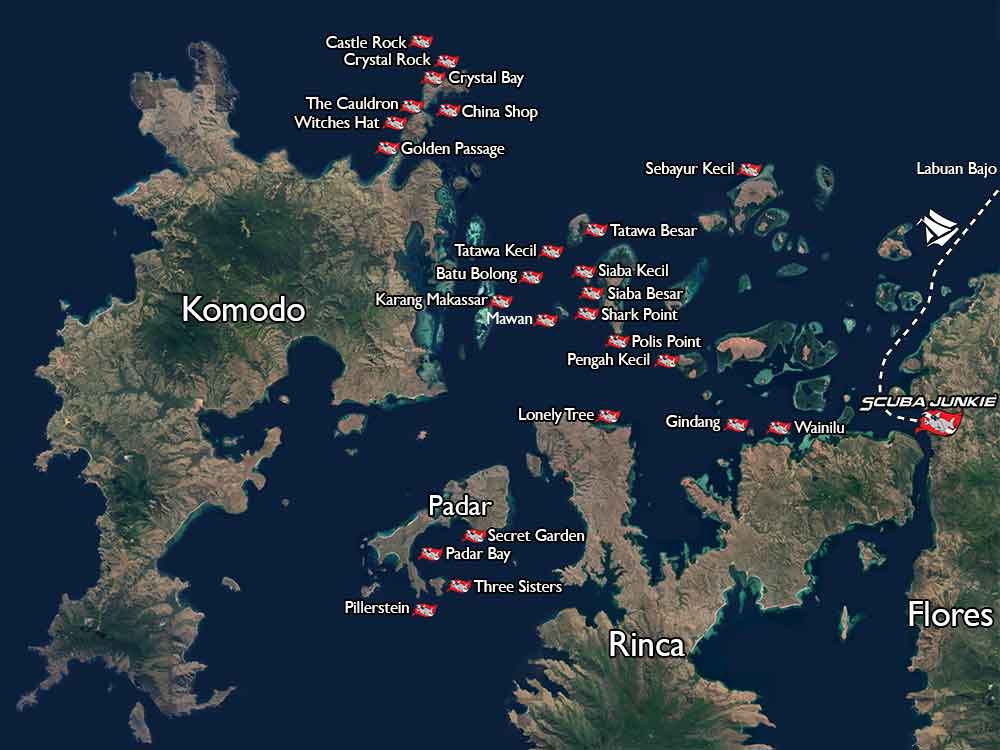
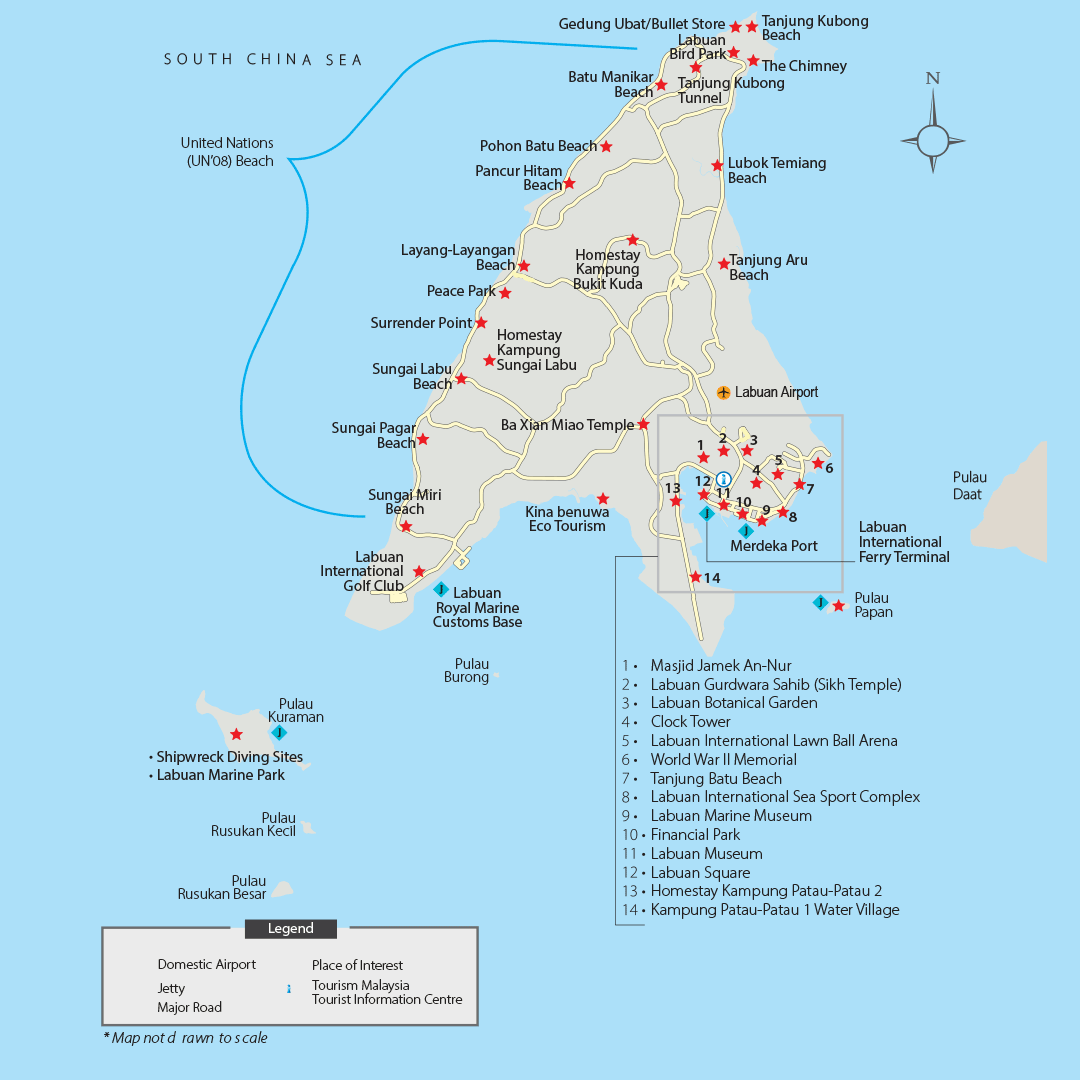
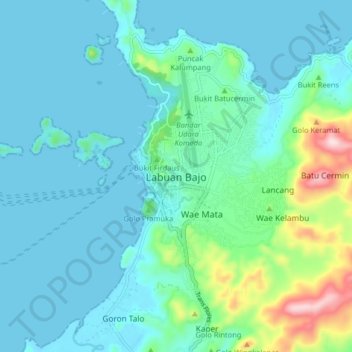
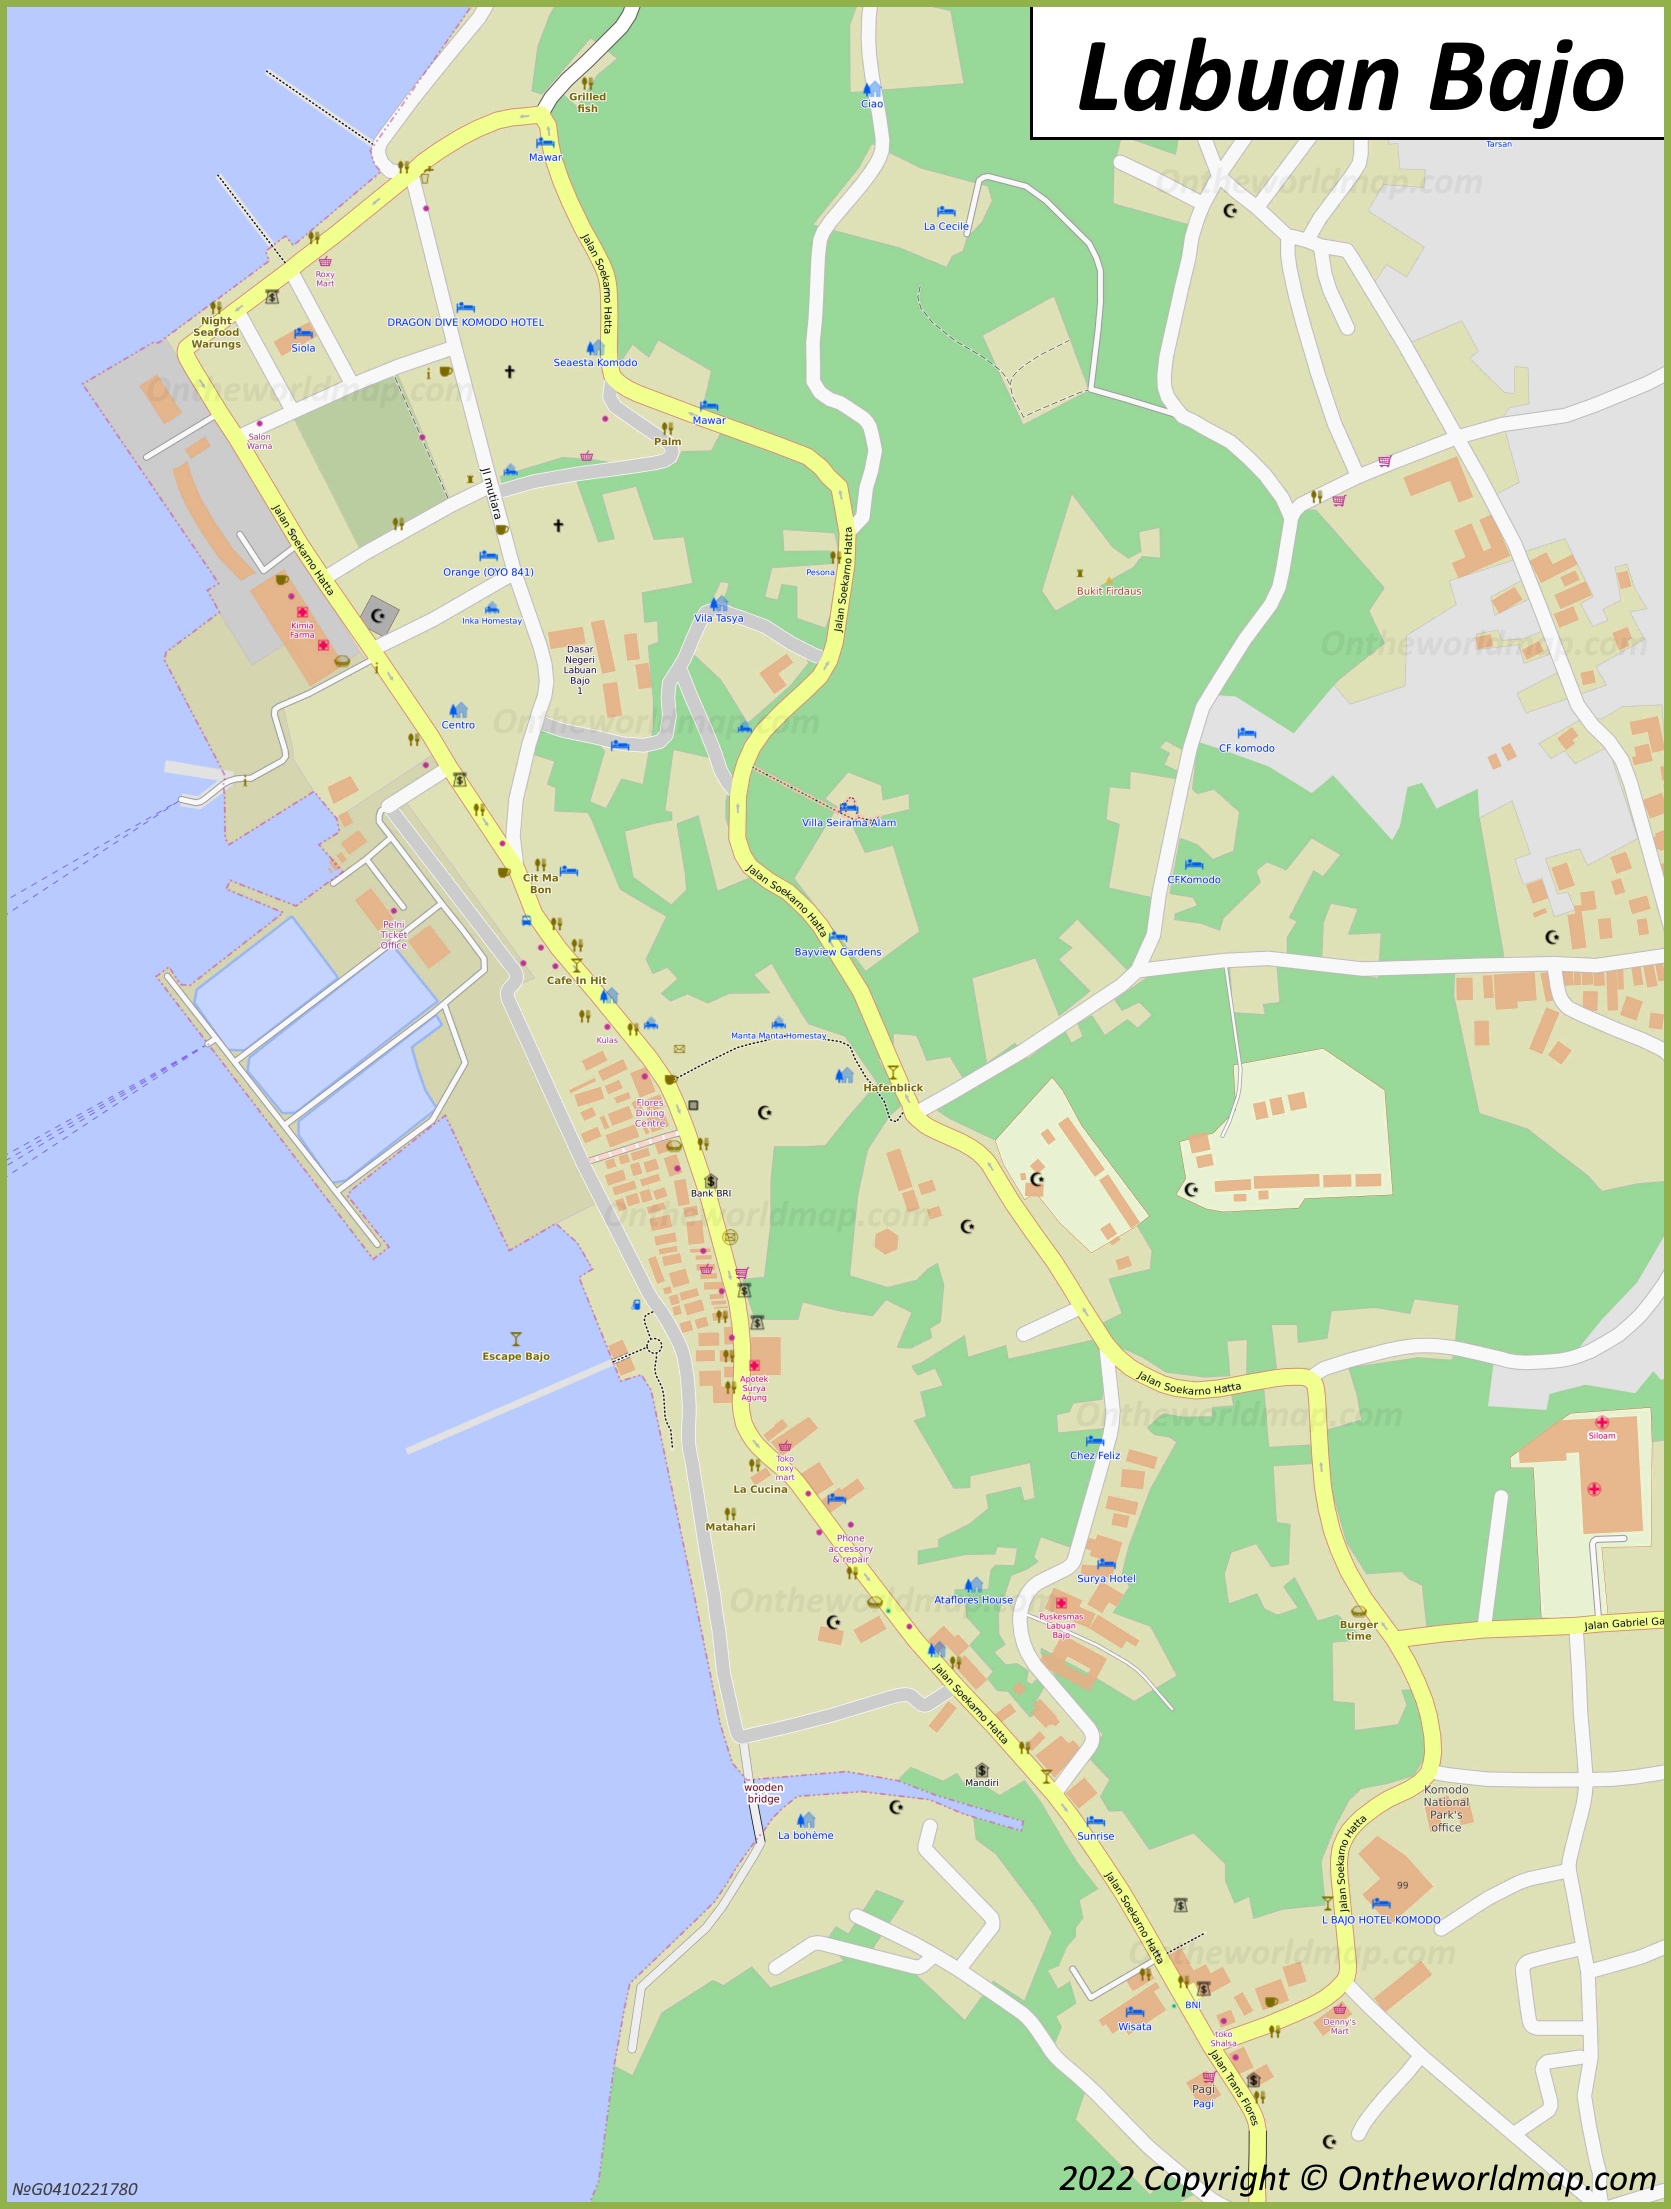
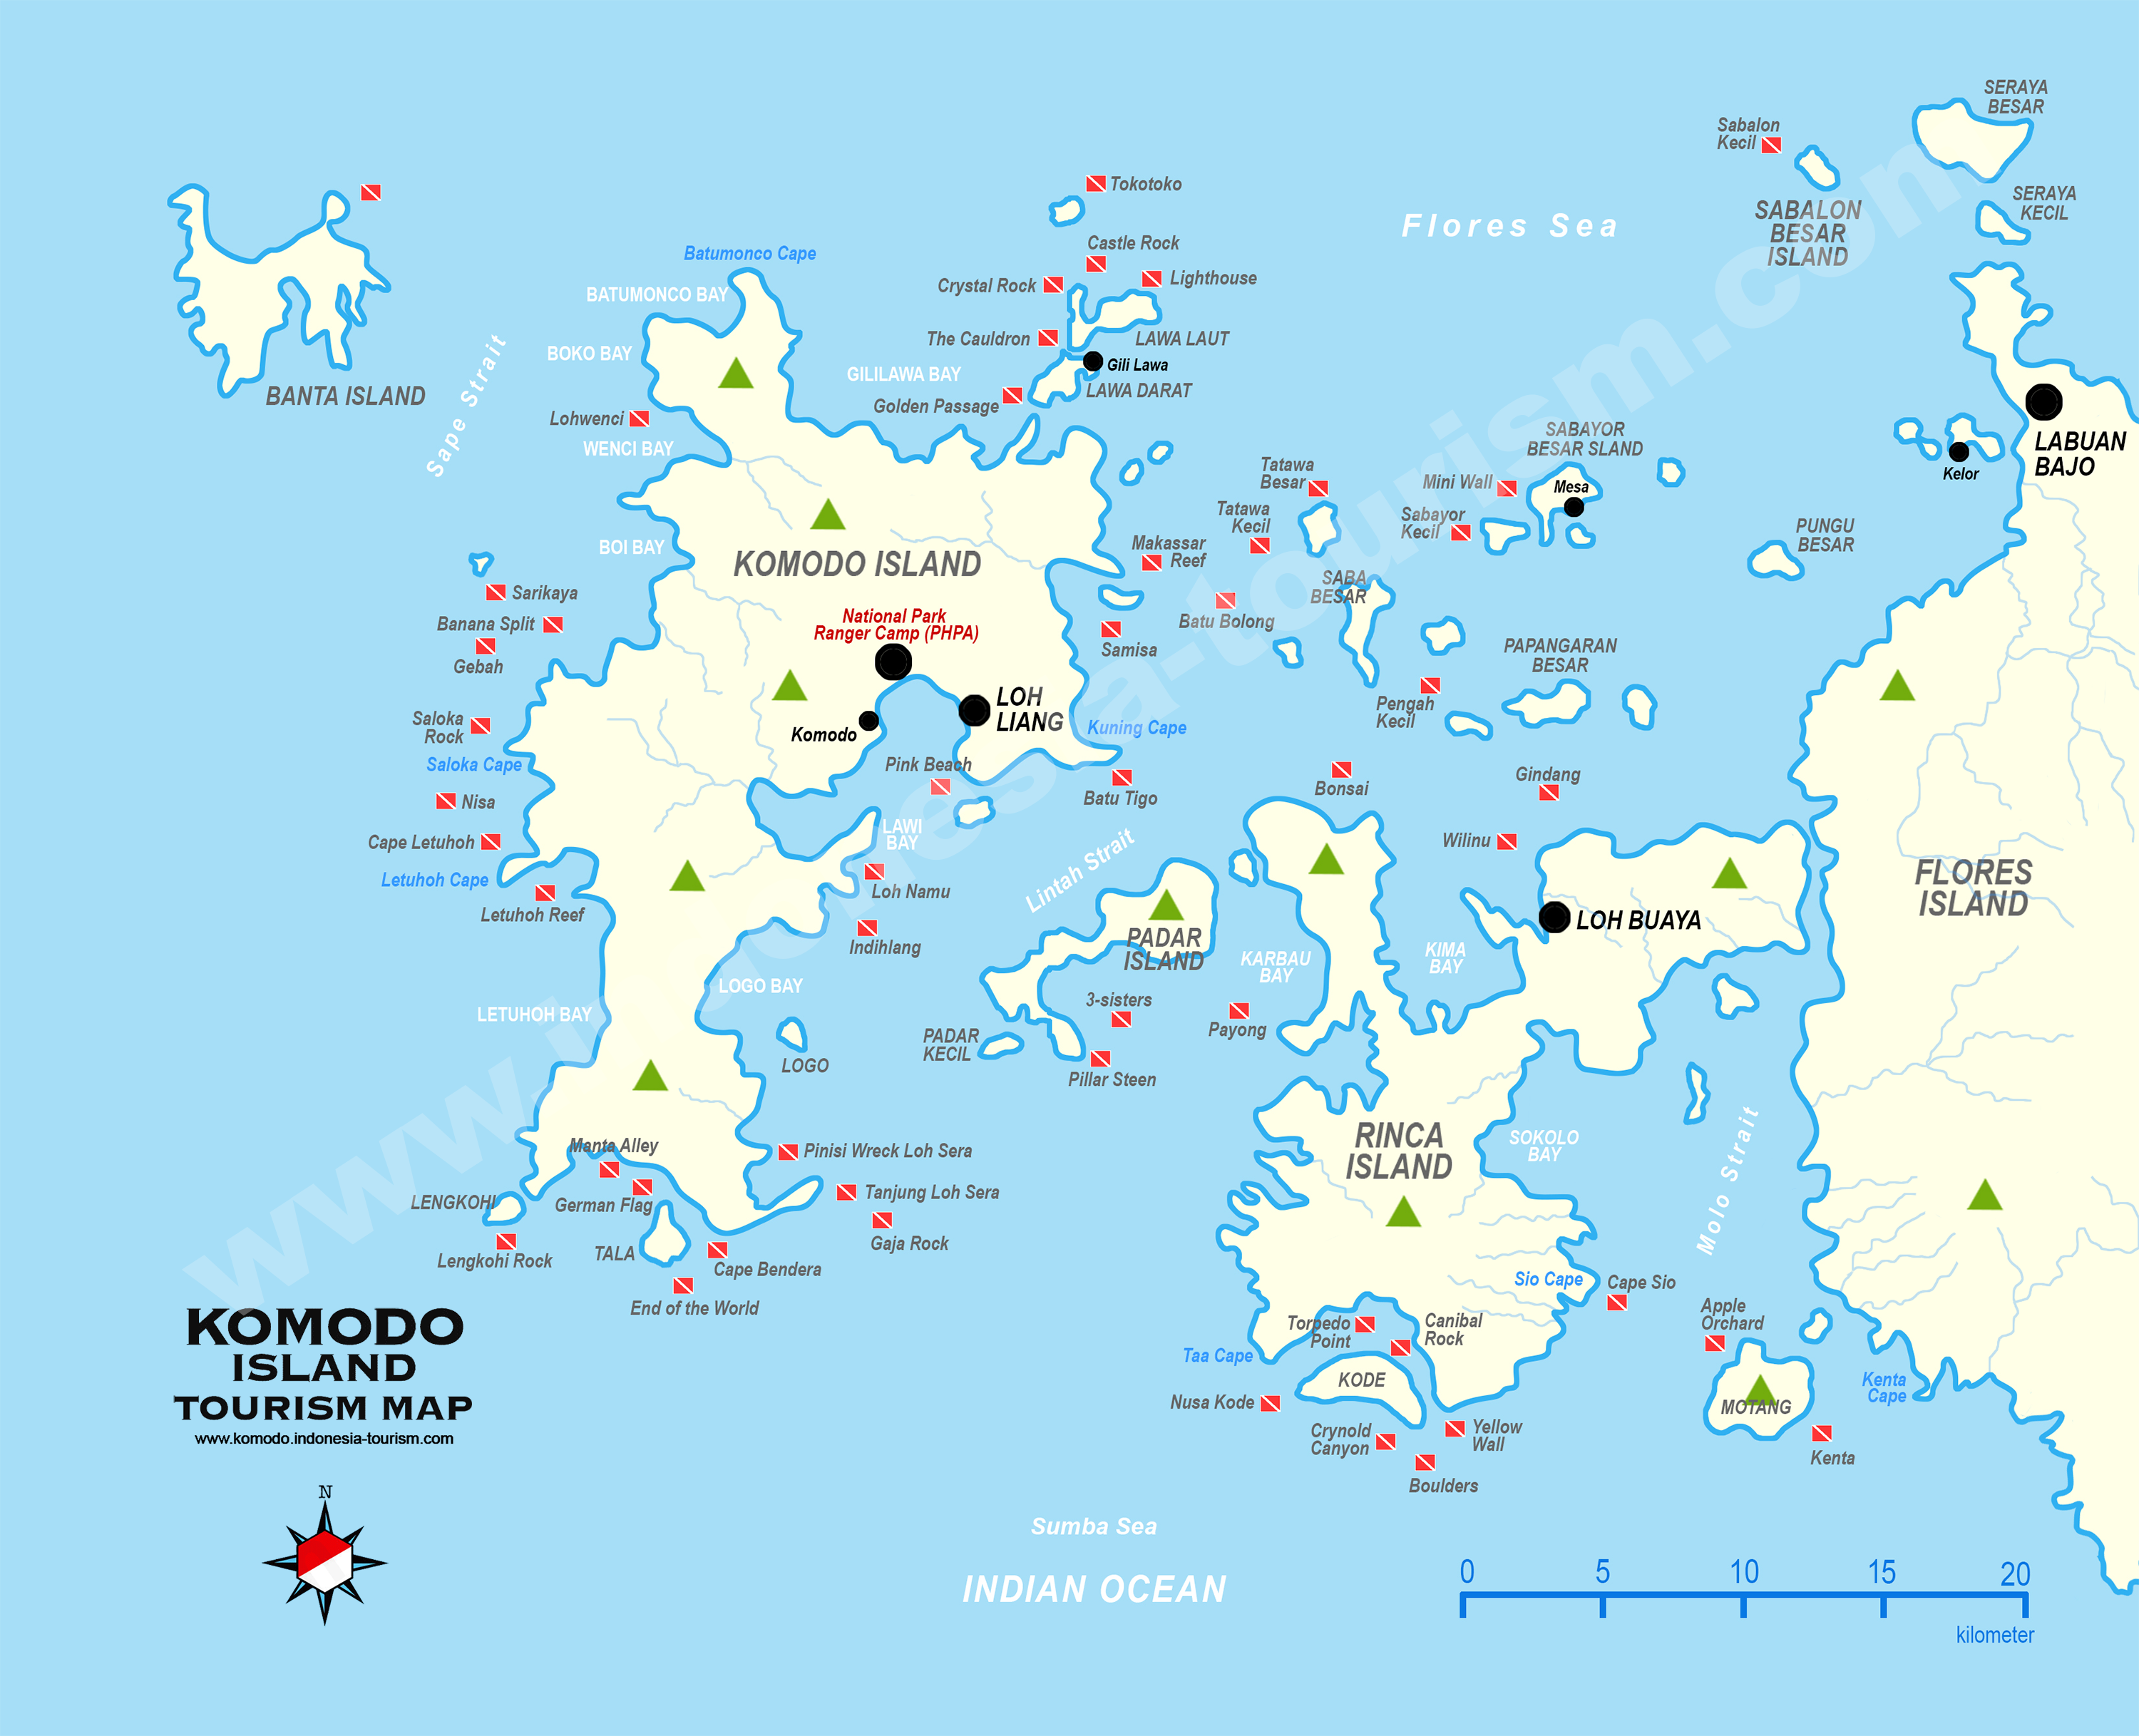
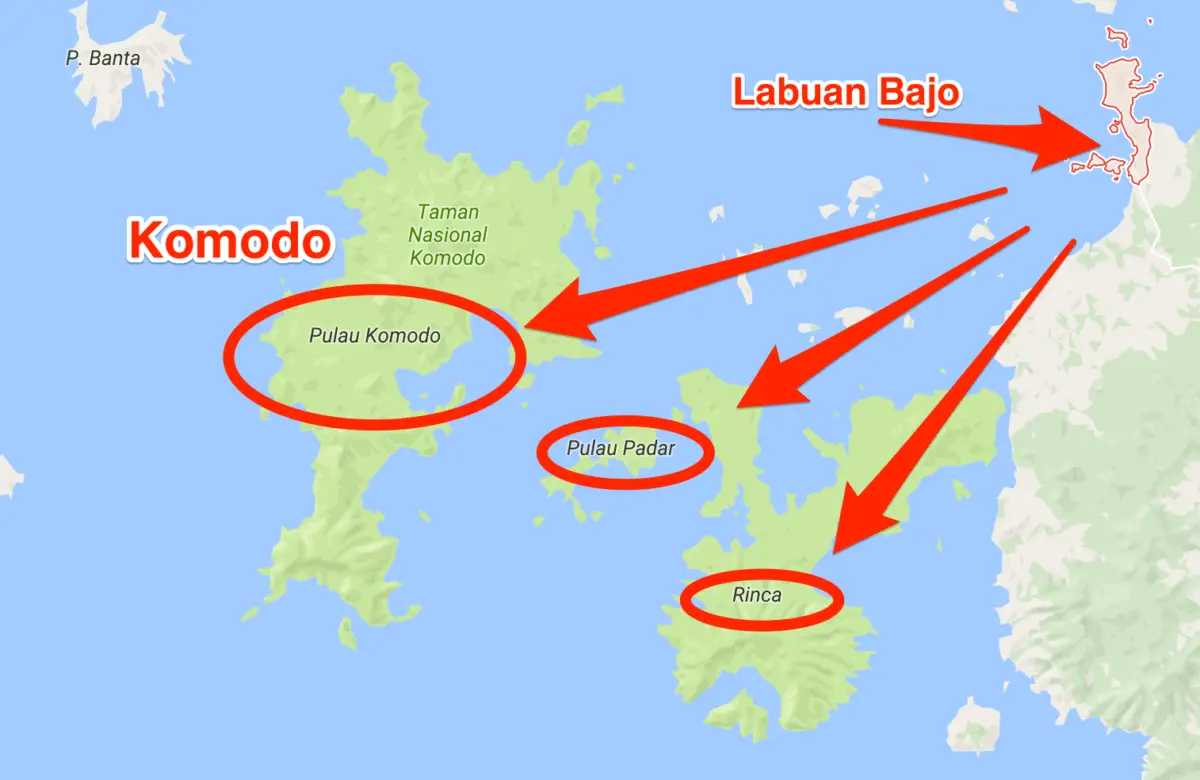
Last update images today Labuan Bajo In Map
 Surrey Close In On Home Quarter-final With Rain-affected Win Over Kent
Northern Diamonds 199 for 4 (Armitage 101*) beat Western Storm 200 for 5 (Wilson 61, Corney 40) by six wickets - DLS
Hollie Armitage scored a brilliant unbeaten hundred to guide Northern Diamonds to an impressive six-wicket victory over Western Storm on the Duckworth/Lewis/Stern method in an entertaining Rachel Heyhoe Flint Trophy match at Cheltenham.
Chasing a revised target of 199 on a day when 41 overs were lost to rain, the visitors reached their target with 16 balls in hand thanks to a captain's innings from Armitage, who posted 101 from 76 balls with nine fours and a six to help Diamonds close the gap on leaders Southern Vipers.
She received valuable support from Sterre Kalis, who contributed 34 in a third wicket stand of 71, and Australia international Erin Burns, who weighed in with 21 not out in an unbroken partnership of 67 in 6.5 overs for the fifth wicket. For their part, Storm were left to rue missed opportunities, having twice dropped Armitage on 23 and 53.
Fran Wilson had earlier raised a perfectly-judged innings of 61 off 63 balls as Storm recovered from a poor start to post 200-5 after losing the toss. Emma Corney made 40 at the top of the order, Nat Wraith struck a forthright 34 and overseas all-rounder Amanda-Jade Wellington provided a hard-hitting 27 at the death. Abi Glen was the pick of the Diamonds bowlers, claiming 2 for 24 from six overs.
Diamonds inserted Storm on a drying surface and promptly reduced them to 26 for 2 in the powerplay, Glen and Rachel Slater removing Sophia Smale and Sophie Luff respectively. Determined to break the stranglehold and afford the innings impetus, Corney twice drove Glen down the ground for four in the ninth, Storm eventually realising 50 two overs later.
Adept at working the gaps, Wilson proved an effective ally and acceleration came with the advent of Katie Levick's leg breaks, Corney launching her over mid-wicket for another boundary. Hampered by a slow outfield, the third wicket pair nevertheless ran hard between the wickets to gain momentum, taking advantage of the College Ground's short boundaries to punish the bad ball when it came along.
Having contributed a 54-ball 40 in an increasingly progressive stand of 61 in 11 overs, Corney had a half century firmly in her sights when she took on Sophia Turner and miss-cued high to Kalis at point, just seconds before a heavy rain shower moved in to force the players off with the score on 87 for 3 at the end of 17 overs.
The loss of a further four overs set the tone for the remainder of the innings, Wilson and Wraith engaging in frenetic running as the Diamonds bowlers were forced to contend with a wet ball. Wraith hit the ground running, scoring at better than a run-a-ball and registering the first six of the innings, while the assured Wilson also picked up the pace to move to 50 via 57 deliveries.
Wraith drove Glen to short extra cover and departed for a 28-ball 34, but Wellington picked up the cudgels immediately, pulling Levick for a six over square and then driving compatriot Erin Burns for four in raising a quickfire 27 from just 14 balls. Applying pressure at the death, Wilson then hoisted Phoebe Turner high over mid-wicket for a massive six as Diamonds wilted under pressure.
Carrying that momentum into the second half of the contest, Storm struck a couple of early blows, Ellie Anderson having Lauren Winfield-Hill held at point and Smale enticing Emma Marlow to miss-cue to extra cover. Wellington then passed up an opportunity to remove influential Diamonds skipper Armitage on 23, dropping what appeared to be a straightforward catch at mid-off and disappointing off spinner Chloe Skelton.
It proved a costly slip, Armitage pulling a Wellington full toss for six to put the visitors ahead on DLS before the next rain break. When they re-emerged to chase a revised target of 199 from one over fewer, the third-wicket pair continued to power on, Armitage going to a 41-ball 50 with her fifth four, a pull shot to mid-wicket at the expense of Wellington.
Trusting in pace off the ball and struggling to exert control in the soggy conditions, Storm needed a breakthrough. Niamh Holland provided inspiration, bowling Kalis via a bottom edge in the act of cutting, the Dutch international having contributed a valuable 37-ball 34 in a stand of 72 in 11 overs.
Requiring 70 to win off 10 overs, Diamonds received another let-off when Armitage was dropped on 53 by Issy Wong on the deep mid-wicket boundary off the bowling of Holland. Alex Griffiths showed how it should be done later in the same over, holding on in the deep to send back Bess Heath for 10 and reduce the visitors to 132 for 4.
But Armitage ensured the home side paid for their profligacy, finding the boundary with increasing regularity to provide acceleration at just the right time in a match-winning partnership with Burns, who used all of her experience to score 21 not out from 13 balls and ensure Diamonds reached their target without any further slip-ups.